Weather Station
Posted: May 6, 2020
Updated: May 10, 2020
Introduction
I found this Weather Meter Kit at SparkFun so I decided to grab one. I built a circuit around it which tests wind speed, wind direction, rain level, and also added a DS18B20 for temperature. The circuit sits outside under a cut up water bottle and sends data into my house with an XBee radio.
Update May 10, 2020: I added a speaker and changed the firmware so it would play music based on if there is wind and the direction it's blowing. I added a second video of that below.
Video, pictures, and explanation below..
Pictures

Here's a picture of the weather station. The sensors are connected to the circuit board with RJ11 connectors. The circuit board is protected from "weather" by being placed inside of a water bottle with the bottom cut off.
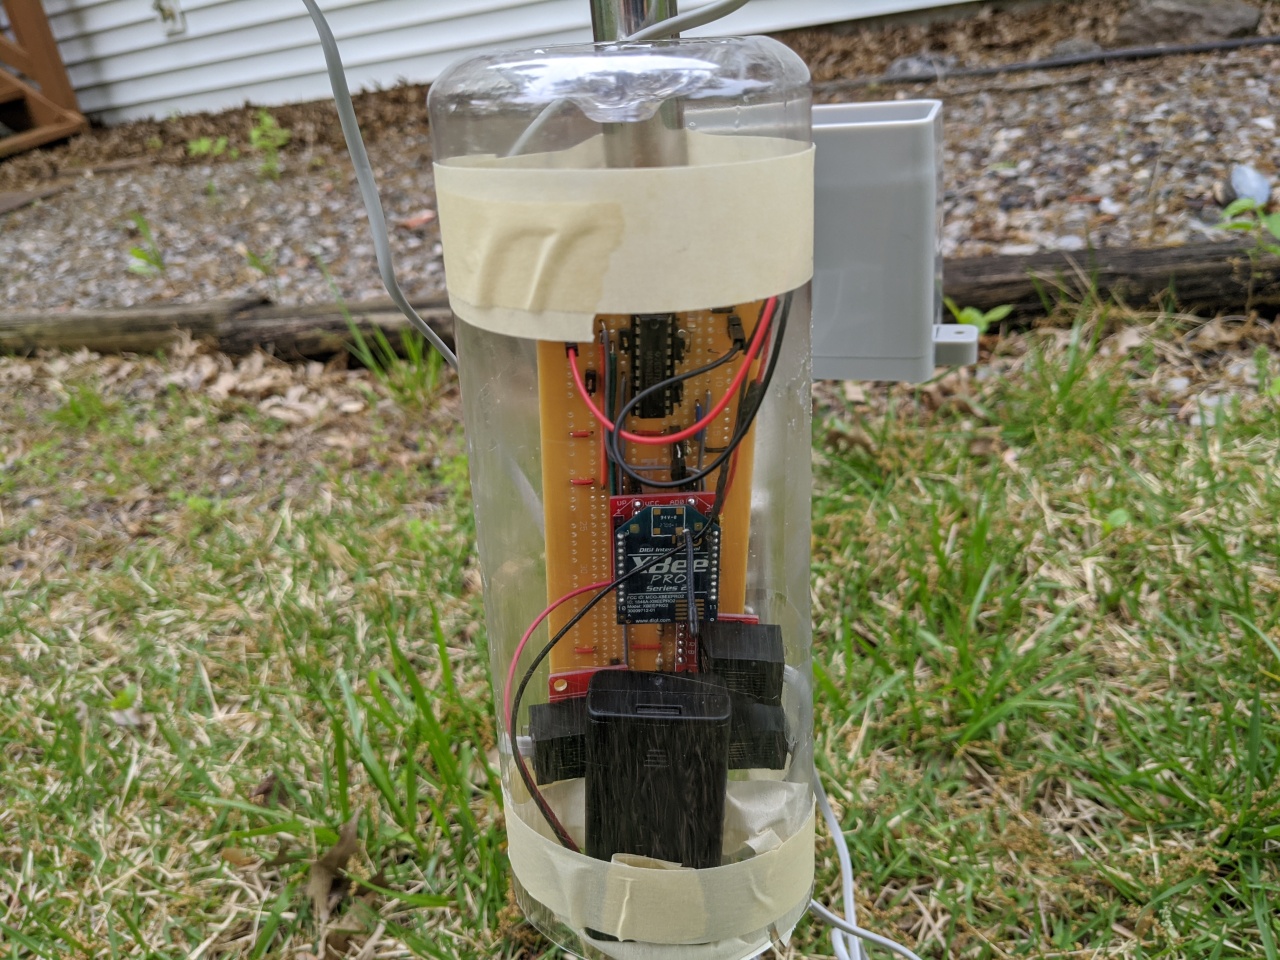
Here's a close-up picture of the circuit in the water bottle. The circuit is stuffed as high up as possible in the water bottle and is powered by 2AA batteries.
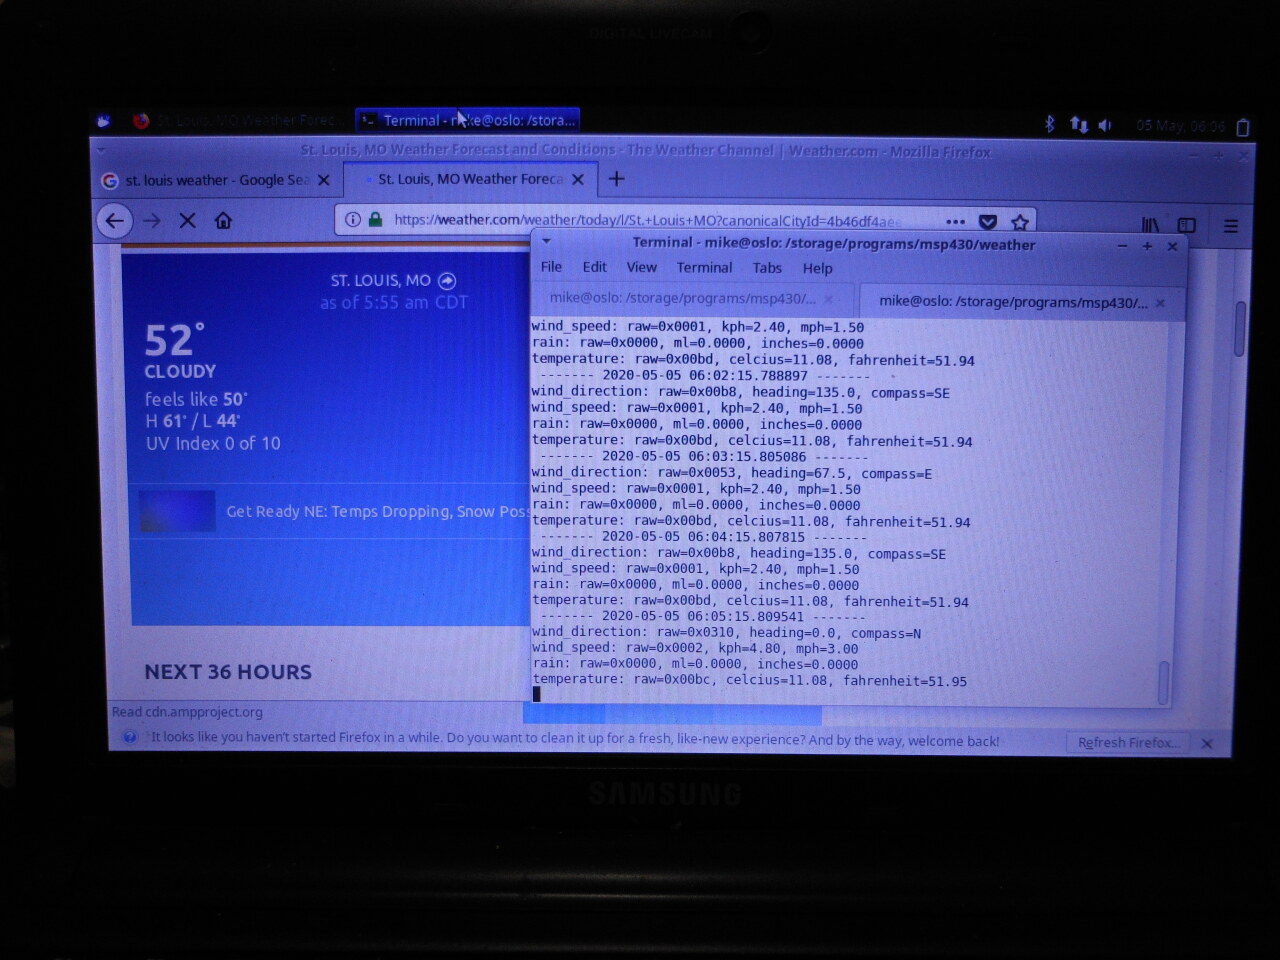
Here's a picture of my netbook screen showing the current output along with a screenshot from the weather.com. Temperature sensor looks pretty accurate, but it ends up when the sun is shining, the temperature in the container goes up. On this day it was mostly cloudy, but the sun would come out and the temp would go up 10C+ higher than the temperature reading from different internet sites. As soon as the clouds came back it would drop back down. The wind direction is kind of off since the wind wasn't around during the second the sensor was read. The day before there was some rain that I did record, but for most of the time the circuit was out it was pretty dry.
Video
Here's a video of the weather station. https://youtu.be/7LBXPQjyv7A
Here's a second video, but this time reprogrammed to play music based on wind direction. https://youtu.be/kQGwu6qaYKg
Explanation
The three sensors are pretty interesting. The rain gauge will send a pulse every time it fills with 0.2794mm of rain, the wind speed sensor sends a pulse at a speed of 2.4km/h, and the wind direction sensor has 16 different resistances depending on what direction it's pointing.
So starting with the wind direction, I used the sample circuit the documentation showed. A 10k resistor connection +3v to one pin on the sensor and the second pin of the sensor connected to ground. I used an ADC pin of the MSP430G2553 pin to connect to the pin on the resistor that's connected to the sensor. This creates a voltage divider, so based on the voltage the microcontroller detects, it can tell which direction the wind is going. I think the weather station was a little tilted so when the wind doesn't have enough strength of move it (or break the gravity of it) it will point a little east.
The wind speed indicator was probably the easiest. I connected it to the TA0CLK pin (aka P1.0). This makes it the clock input of the MSP430G2553 TIMERA module. The TIMERB module is connected to a 32.768kHz crystal so it interrupts every once a second. In the TIMERB interrupt the counter on TIMERA is recorded if it's higher than the current wind speed count. Every minute, when the data is transmitted over the XBee modules to the computer, the top wind speed is reset to 0.
The rain indicator is kind of done.. wrong. I should have connected it to an interrupt, but instead I just polled it in the main spin loop. This means if the pulse for rain level happens when temperature is read or data is transfered, that pulse will be lost. Maybe I'll fix it some day.
Every 60 seconds chip will send the current weather information over UART in JSON format. The UART is connected to an XBee module that's paired with another XBee on a computer in my house. I wrote a Python3 script to read the serial port and dump the data to the screen.
Source code
weather.asm
Copyright 1997-2026 - Michael Kohn
