Nexys2 FGPA Board On Linux
Posted: June 4, 2011
Introduction
I got a Digilent Nexys2 FPGA Board a while ago to practice with VHDL, but I didn't end up using it much do to the fact that I needed Windows to program it. I also found the Xilinx IDE a bit irritating. For me, life is so much easier using vi to edit some text files and typing "make" on the command line to build rather than using a big GUI that takes over most of the display (or on Windows the entire display since Windows developers seem to have the single-tasking "just maximize it!" mentality"). Anyway, I found out over the weekend that Digilent has a Linux version of their JTAG software and I finally found out how to use Xilinx's devkit using only the command line so I made a little test program and decided to post it so others with the same command-line mentality have all the information they need to do the same thing.
Related Projects @mikekohn.net
| VGA: | FPGA VGA, SX VGA, Atmel VGA, Propeller Poker, Nexys2, Java VGA |
| FPGA: | FPGA VGA, Nexys2, Glow In The Dark Memory, Intel 8008, F100-L, RISC-V, x86 / 68000, MIPS, MSP430, PowerPC, W65C832, Apollo 11, PDP-11 |
How To Use This Board With Linux
So the Digilent Adept software
has its own installer. I ran it on Gentoo Linux and it just worked.
The oddly named 'djtgcfg' program that comes with it detected my directly
connected Nexys2 board. I haven't tried it yet with their USB JTAG cable,
but I'd assume it would work just the same. Anyway, I made a simple binary /
octal counter in VHDL (it can be downloaded below) and made a little Makefile
for generating the bitfile and programming the board. So I guess the first
step is to set the bash environment for Xilinx development. On my 64 bit
Gentoo system,
with their 11.1 devkit I would type:
source /opt/Xilinx/11.1/ISE/settings64.sh
In the Makefile, it runs the following sequence:
PROGRAM=nexys2_test
PART=xc3s500e-fg320
default:
echo "run -ifn $(PROGRAM).prj -ifmt VHDL -ofn $(PROGRAM) -p $(PART) -opt_mode Speed -opt_level 1" | xst
ngdbuild -p $(PART) -uc $(PROGRAM).ucf $(PROGRAM).ngc
map -detail -pr b $(PROGRAM).ngd
par -w $(PROGRAM).ncd parout.ncd $(PROGRAM).pcf
bitgen -w -g StartUpClk:JtagClk -g CRC:Enable parout.ncd $(PROGRAM).bit $(PROGRAM).pcf
Finally to program the board:
djtgcfg -d DOnbUsb prog -i 0 -f nexys2_test.bit
I picked up the DOnbUsb paramter along with -i 0 from probing the JTAG with first:
./djtgcfg enum
returning an output of "Device: DOnbUsb" and then:
djtgcfg -d DOnbUsb init
to get the index of the device I want to program.
As a side-note, I copied the /opt/Xilinx directory and ~/.Xilinx (for the license file) from my 64 bit Gentoo box to my little Ubuntu netbook and ran the Digilent installer for the 32bit version and this whole process works now just the same on that computer.
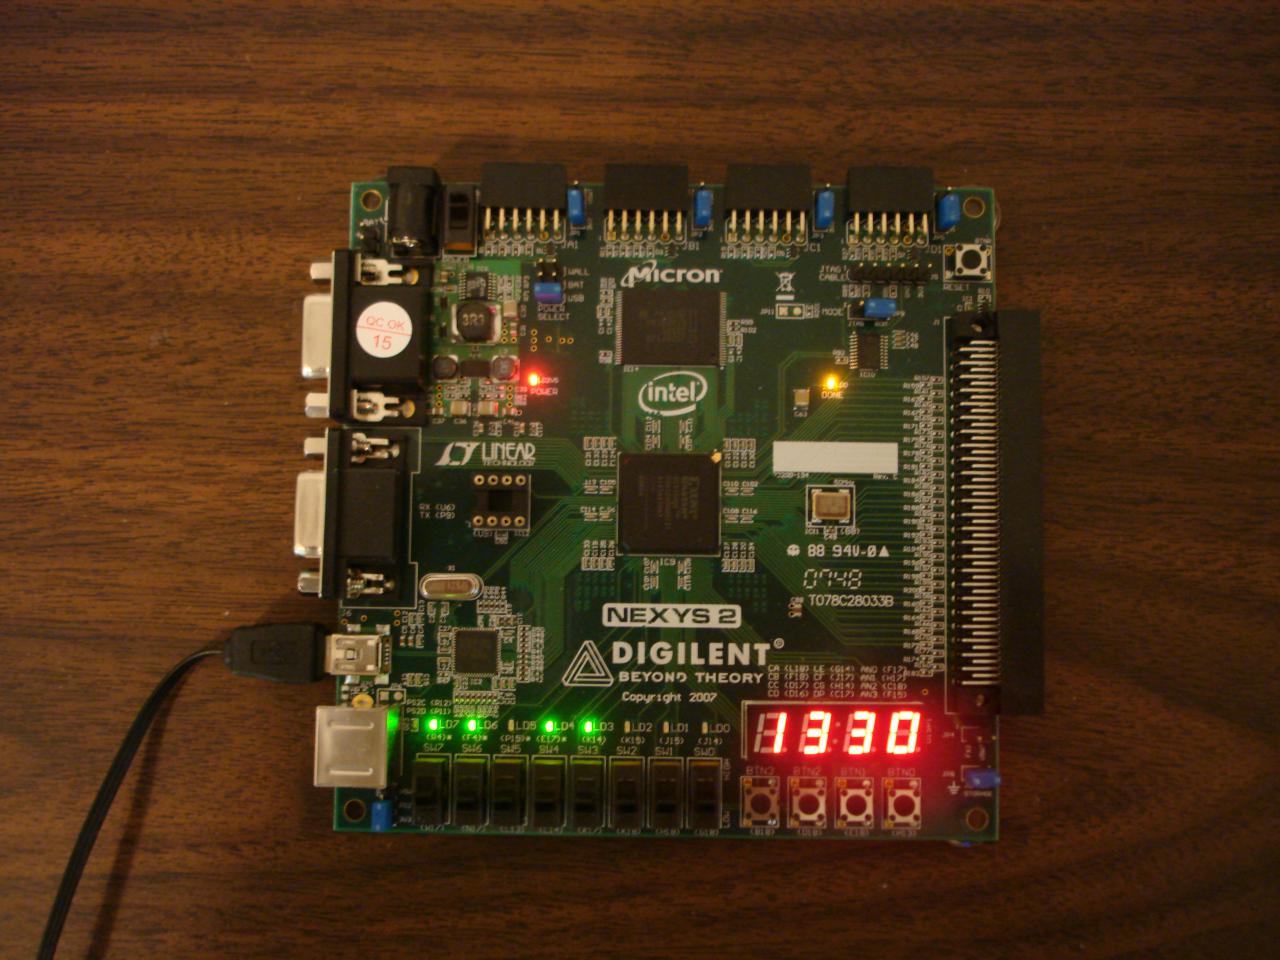
Picures
Source code
https://github.com/mikeakohn/small_projects/tree/main/nexys2_vga
Here's some VHDL code for doing rs232 communication on the Nexys2 board. This program will send the letter "C" when button 0 is pushed and will echo back any chars sent to the UART.
https://github.com/mikeakohn/small_projects/tree/main/nexys2_rs232
Copyright 1997-2026 - Michael Kohn
