Modern 6502
Posted: March 27, 2016
Updated: April 16, 2016
Introduction
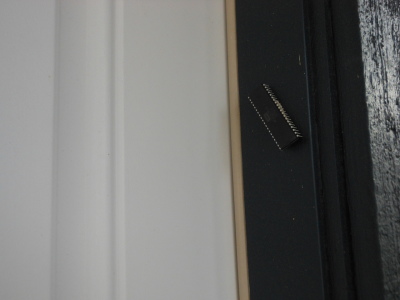
A few years ago while searching for electronic parts, I stumbled on the Western Design Center W65C02 processor. Even though it's in a DIP packaging, which makes it easy for a hobbyist like me to breadboard, it would still have required RAM and other chips to make it useful. Considering this chip was the first processor I learned to program on, the 6502 is more like a religious thing for me so I got two of them. I ended up mounting one of them on the side of the door at the entrance to my house for spiritual protection.
A few years later while doing my daily hackaday.com reading, I discovered the W65C265SXB board, a modern microcontroller with a 6502 (actually 65C816) at its core. I did a really good job resisting buying one for a while, but eventually gave in. To put this board to use I decided to put up this page with 3 small projects (added a 4th more recently) to show off some things that can be done with this newer 6502 chip:
- LED Blinking (assembly)
- Music Playing (Java)
- Software SPI DAC Sound Player (assembly)
- More Tone Generator (assembly)
Besides the 4 projects on this page, this board was also used this board to record and read data from audio cassettes on my Tape Data Recorder page and read chocolate data off a Swedish pancake on my PANCAKE-ROM page.
There's also a W65C832 FPGA project on this site which is a 32 bit version of a 6502.
Boards
So there are actually 4 SXB boards to choose from. I chose the 16 bit 65C816 based board since it can also run 8 bit 6502 programs in emulation mode. There is a version with a pure 6502 core too. This board is actually pretty loaded... 4 UARTs, lots of IO, 2 tone generators, and a ROM chip full of routines to make talking to the hardware simpler. Anyone wanting to play with the programs on this page should get the W65C265SXB board.
The tools used to assemble / compile / upload these programs:
Need to give Joe +1 for writing the 6502 / 65C816 modules for naken_asm and Java Grinder, and for the nice GUI for uploading software to the board.
Related Projects @mikekohn.net
| 6502: | W65C265SXB Projects, C64 Java, Atari Java, Apple IIgs Java, Tape Data Recorder, PANCAKE-ROM, Apple IIe Robot, W65C832 |
LED Blinking
It's an unwritten rule that every first microcontroller project must be an LED blinking program. This program was written in two different ways here. The first way is using 65C816 instructions and the second puts the chip into 65C02 emulation mode (using the instructions "sec" and "xce") and is written in 6502 assembly. One thing to not forget is the "sei" instruction at the top of the program to stop the chip's interrupt routine from running. The software does some pretty odd things if this isn't done.
To assemble the programs, naken_asm is used and then Joe's EasySXB GUI is used to upload them to the board. After uploading the hex files for the LED blinking program to the SXB board, simply need to put 0x1000 (the .org starting address of the software) in the textbox labeled "Address:" and press the JML (jump long) button. Before trying to upload any new software to the board, just need to remember to push the reset button on the board.
Source code:
led_blink_65c816.asm
led_blink_65c02.asm
Here's a video of how to start up EasySXB and upload the led_blink_65c816.hex LED blinking demo to a board. https://youtu.be/E936wkrpAgs.
Music Player
The W65C265 chip has 2 tone generators built in, so I decided for a second project to play some music. The tone generators, unlike toggling an I/O pin with a timer, generates a sine wave. Since this project is pretty similar to a previous SN76489 MIDI player project I ended up using the same C program to play the .mid files. The idea is, the C program on the PC parses the .mid file and sends 2 bytes over to the chip, the first byte tells it which channel and volume to play at and the second byte tells the frequency using a MIDI representation.
The C .mid player was designed for the original SN76489 MIDI player circuit, so it really wants to talk to a circuit with 2 sound chips that have 3 voices each. In this case, the SXB board appears as 2 channels with one voice each. So only having 2 voices heavily limited the .mid files that would sound nice. It ended up the Bach Invention 13 sounds good with just two channels, so I used that one in the video below. It is possible that I could have used the extra timers on the chip to get more voices with a square waveforms, but I didn't want to create extra hardware for mixing channels.
Unlike the LED blinking programs which are written in assembly, I wanted to show off the capability of Java Grinder for the 65C816 so this program is written in Java. I can already imagine all the odd comments about writing Java for a 65C816, but it's actually pretty slick. There's even an Atari 2600 game Space Revenge written in Java with Java Grinder for the 6502.
The thing I find most interesting is quality of the sound. Those tone generators sound really nice with the sine waveform. I still like the sound of the SN76489 (see the video and mp3's on that page to compare) but the W65CSXB is really nice on the ears (minus having to turn those guitar amps up a little too high in order to capture the sound with my camera).
Source code:
ToneGenerator.java
Here's a video of the software playing Bach's Invention 13 (aka, the Commodore 64 theme song). https://youtu.be/MCuxZxErThU.
Software SPI
There are at least two famous robots that run on 6502: Futurama's Bender and The Terminator. I thought it might be fun to write some 6502 code for part of one of these robots, so I downloaded a sound sample of The Terminator and loaded it on this chip along with some code to communicate with an MCP4921 DAC chip.
I wrote two programs here, one with a very generic software SPI and one optimized for playing sound. I'm not sure if anyone would care if I used a sound sample from The Terminator, so I left it out of the git repository. To assemble this project, download a .wav file and run the following commands:
sox ill_be_back.wav -b 16 -r 4000 out.wav
./convert_sound out.wav
The convert_sound program is included in the EasySXB git repository. It converts 16 bit sound samples from a .wav file to 12 bit DAC format (a big endian 16 bit number where the upper 4 bits are always 0x3 and lower 12 bits are the sound sample). In the play_sound.asm source file, uncomment the .binfile line and comment out the .db line. Type make.
To hook up the MCP4921 SPI DAC chip, connect:
- 1) Vdd to +5v (P4x Pin 1)
- 2) /CS to P40 (P4x Pin 3)
- 3) SCK to P41 (P4x Pin 4)
- 4) SDI to P42 (P4x Pin 5)
- 5) /LDAC to GND (P4x Pin 2)
- 6) VrefA to +5v (P4x Pin 1)
- 7) AVss to GND (P4x Pin 2)
- 8) VoutA to 10uF cap to amplifier
Source:
software_spi.asm
play_sound.asm
Here's a 6502 programmed to be a part of The Terminator. Note that when I'm running this program I press JSL instead of JML. JML jumps to the location while JSL jumps to the location as a subroutine. The rts instruction should bring control back to the ROM when speech stops. https://youtu.be/di7iV8C51F4.
More Tone Generator
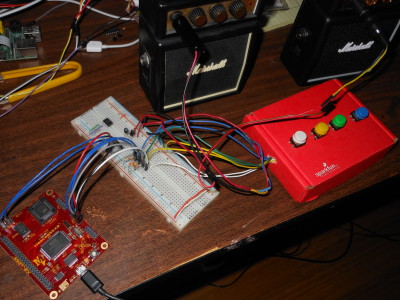
I took a box that SparkFun sent me and installed 4 buttons I got on their website. I soldered wires to the button, connected to a breadboard, and connected the I/O pins of Port 5 of the W65C265SXB board to the buttons. Each input line is pulled up with a 10k resistor and will short to ground when the buttons are pushed.
The firmware is written in 65C816 assembly and is programmed to be the first 2 notes (dyads) of the chords F major, B diminished, G major, and E minor. Buttons can be pushed with my foot while playing guitar (not as as easy as I thought it would be).
Source code:
foot_pedal.asm
Video of me playing guitar over the tone generator sounds. https://youtu.be/zBqONTSSqWk
Copyright 1997-2025 - Michael Kohn


