Remote Control Food
Posted: August 7, 2016
Introduction
So last week I'm sitting at my desk at work kind of hungry. I remembered I had a Snickers bar from over a year ago sitting on my shelf so I decided to finally eat it. While eating it I started wondering if it floats on water and if I could attach a circuit to it to make it move and control its direction. I ended up designing and building a motor control circuit that takes input from a Syma S107 controller and built a few edible remote controlled toys with it, mostly cars for reasons explained later.
Videos, pictures, schematics, source code, etc further down on this page.
Related Projects @mikekohn.net
Videos
This is the first test of the circuit. Moving forward on the left stick controls the speed of both motors. If the right stick is moved to the left, the right motor turns off and if it's turned right, the left motor turns off. https://www.youtube.com/watch?v=_QzAReWnzgE
I hooked the circuit to a chunk of styrofoam and made "paddles" out of masking tape which was reinforced with toothpicks proving the circuit could work as a boat. https://www.youtube.com/watch?v=yvmz7sgMjaE
Here is a 3 Musketeers bar, Snickers bar, chicken sausage, carrot, and a green pepper in water. https://www.youtube.com/watch?v=riCJXvKaHl0
Explanation
So step 1 was to find a couple motors that were small enough to sit on a small "boat" in my sink and could move at a good speed to propel the boat forward. I ended up finding a motor on Pololu's website that seemed like a good match: "Key specs at 6 V.. 120 RPM and 40 mA with no load, 12 oz-in (0.9 kg-cm) and 0.36 A at stall". This could give me around 1-2 rotations per second I was guessing. With a paddle on either side of the shaft of the motor, probably should be plenty for rowing.
After doing some research, it seemed like the best candy for this project would be 3 Musketeers since it seems to have a less dense filling. So I got a package of 6 bars and put two together still in the wrapper in my sink. They did float. I then weighed the circuit, motors, and battery and came up with 100 grams. I then placed 100 grams worth of dead AA batteries on the 2 chocolate bars and found it was hard to keep balance and was sinking due to being too heavy so I decided to try it as a car instead.
I went back to Pololu and found a set of wheels that fit the motors and a wheel / shaft combo that could work on the front. The car seemed to work with the 3 Musketeers, but it lost structural integrety pretty quick so I tried Snickers (which really didn't do much better), a Johnsonville chicken sasuage (which held together great.. sorry I didn't try the steering in the video), and a carrot.
I didn't exactly give up with the boat yet. Before the parts for the car arrived in my mailbox I tried a chunk of styrofoam, which worked really well, so after building the cars I tried some food again. I tried pinning a bunch of Rice Krispy Treats held together with toothpicks thinking that the air in the treats would help it float. As I slowly set it in the water and got greeted with the Snap, Crackle, Pop song, I realized this was just going to sink. I then tried rice cakes glued together with Crisco grease. Putting the 100 gram battery pack on top, it basicaly just flipped over from being too top heavy. I finally tried a green pepper which actually worked pretty well.
For the circuit I picked an MSP430G2231 just because the development kit makes it so much easier than other microcontrollers. A couple issues I had were first of all trying to find a MOSFET that will open up the gate at 3.3v. With the lower amount of current flowing through the transistor, the RFD14N05L should be fine. The second problem is the MSP430 DCO. I had a chart of MSP430 DCO values but it seems that either this chart only works for MSP430G2553, or I just got lucky that the two chips I tried were similar in speed. Anyway, I calibrated the MSP430G2231 with an oscilloscope.
The firmware is pretty simple. It polls the IR receiver for a signal and then decodes: 2ms signal / 2ms no signal (as the header) and then 32 bits of data of 0.3ms on / 0.3ms off for a 0 or 0.3 on / 0.6ms off for a 1. The 32 bits are 1 byte of YAW, 1 byte of PITCH, 1 byte of THROTTLE, and 1 byte of the CORRECTION knob sent as most significant bit first. Based on the position of the THROTTLE, the circuit will send pulses of voltage (PWM) to both motors. If the YAW reaches a threshold to the left or right, one of the motors will turn completely off. I was originally going to make it so just off balances the motor speed depending on how far left / right the YAW is, but noticed the numbers being sent from the controller weren't centered properly and didn't go full 0 to 127 so I opted to keep the firmware simpler.
To power the board I used 4 AAA batteries. I was thinking of using a small 2 cell LiPo, but I felt more comfortable with 4 AAA's falling in my kitchen sink than I would have with a LiPo battery.
Parts List
100:1 Micro Metal Gear motor
Pololu Wheel 32x7mm Pair
Tamiya 70192 Slick Tire Set
TSOP38238 IR Receiver
MSP430G2231
RFD14N05L MOSFET
Pictures
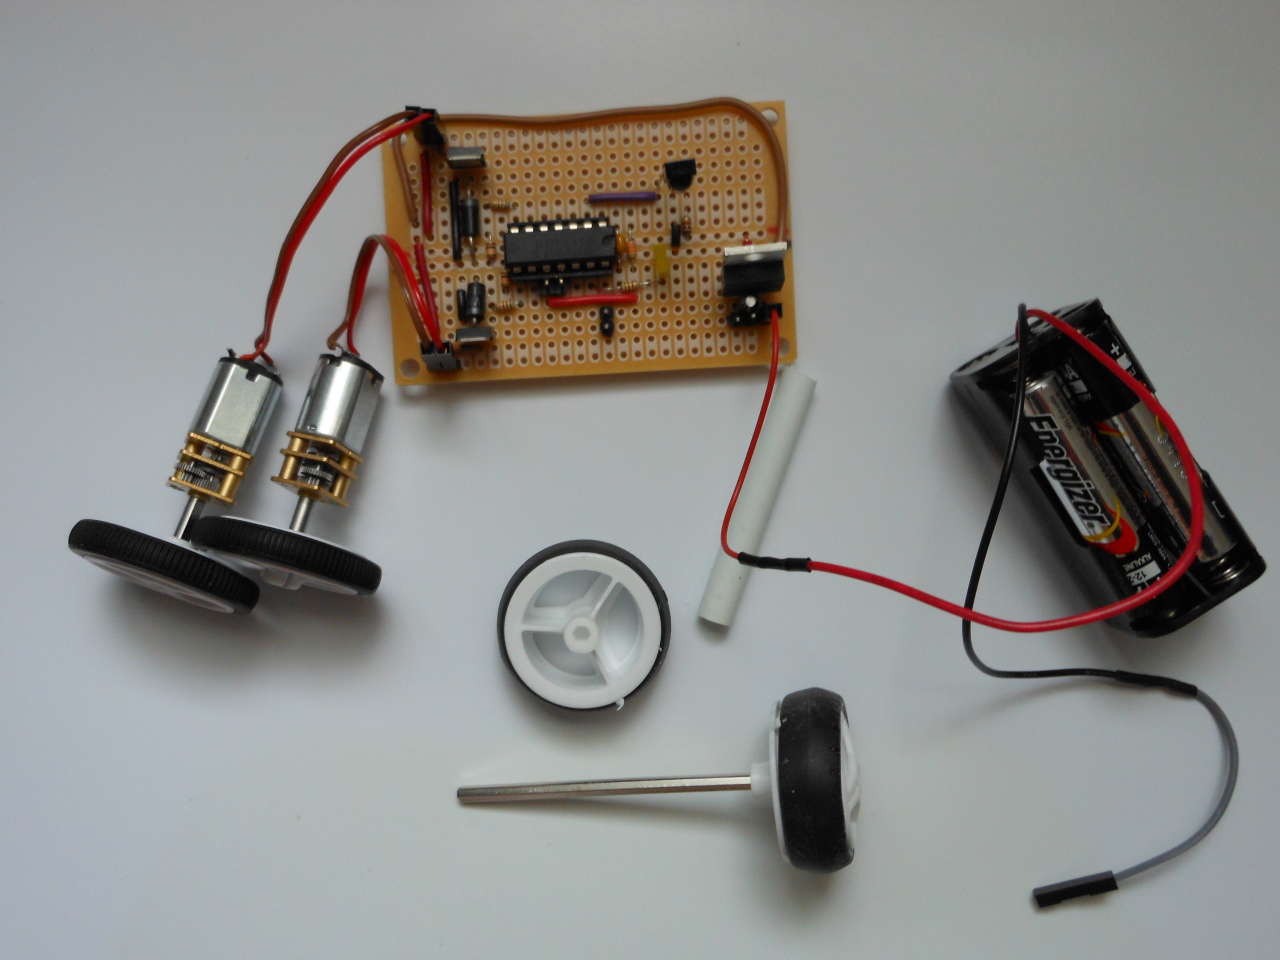
Here's the circuit and motors with the wheels installed. The front wheels are connected with a metal shaft.
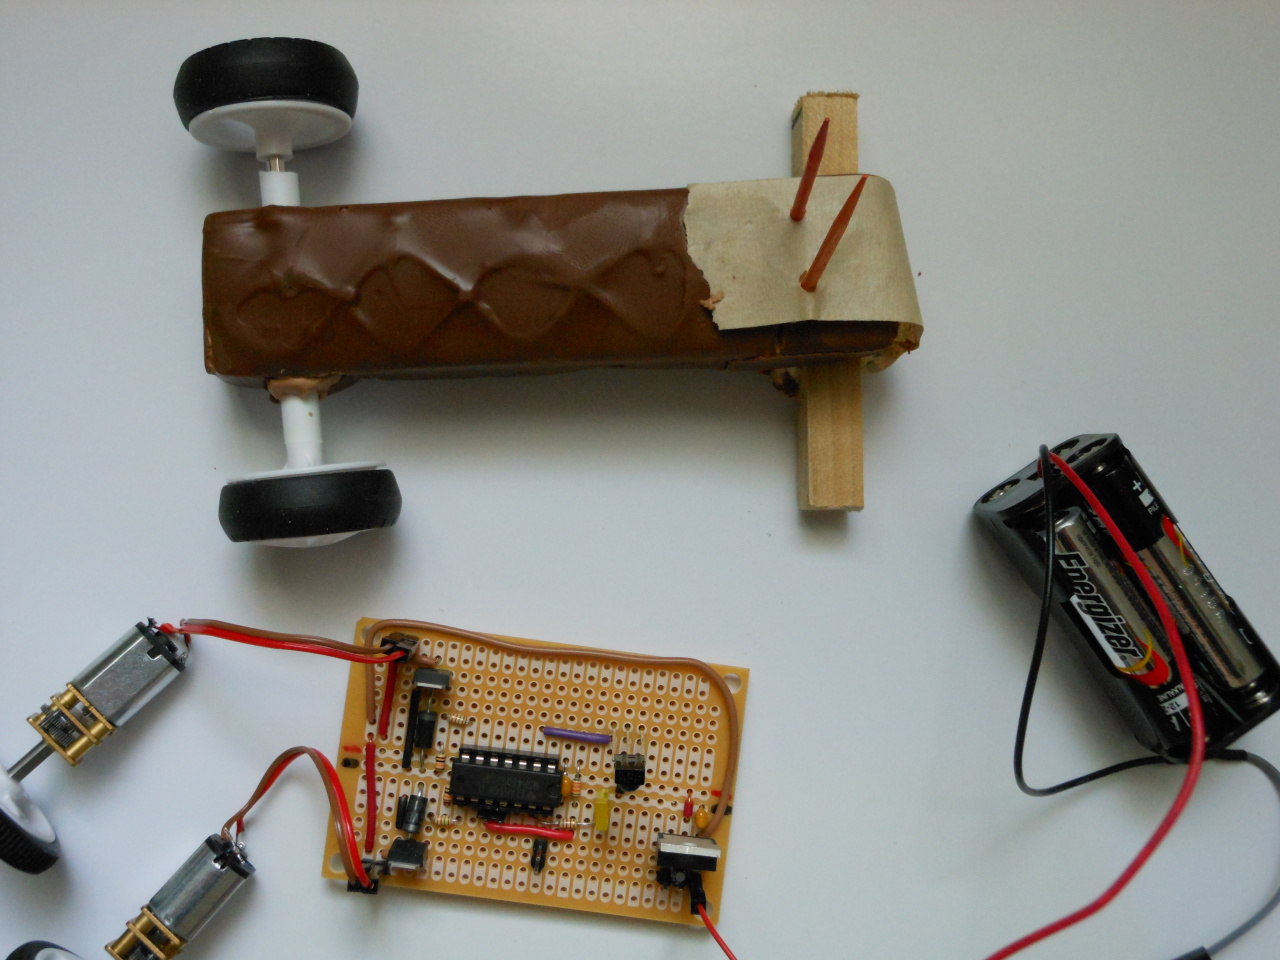
Here's a 3 Musketeers bar with a white tube installed in the front. The shaft that connects the two front wheels is inserted in the white tube. Since masking tape doesn't stick well to chocolate I installed 2 toothpicks in the back and taped the battery pack around the toothpicks (as seen in the videos).

Here's the circuit completely installed (except for the battery) on the car and ready to test.
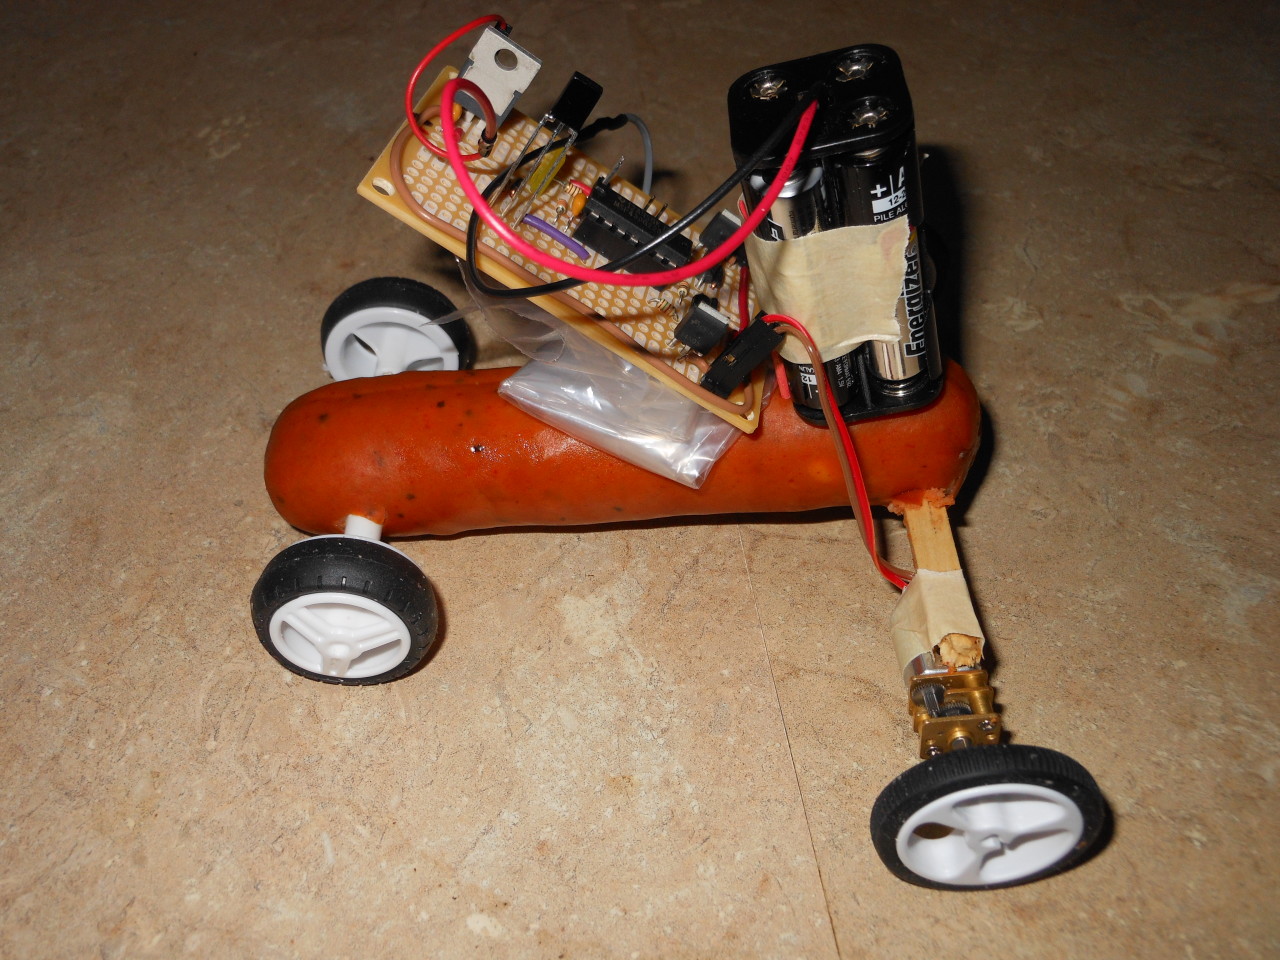
And here's the circuit installed on a Johnsonville Chicken Sausage. The circuit is in that odd position due to the short length of the wires. I put a ziplock bag under the circuit to protect it from meat-juice.
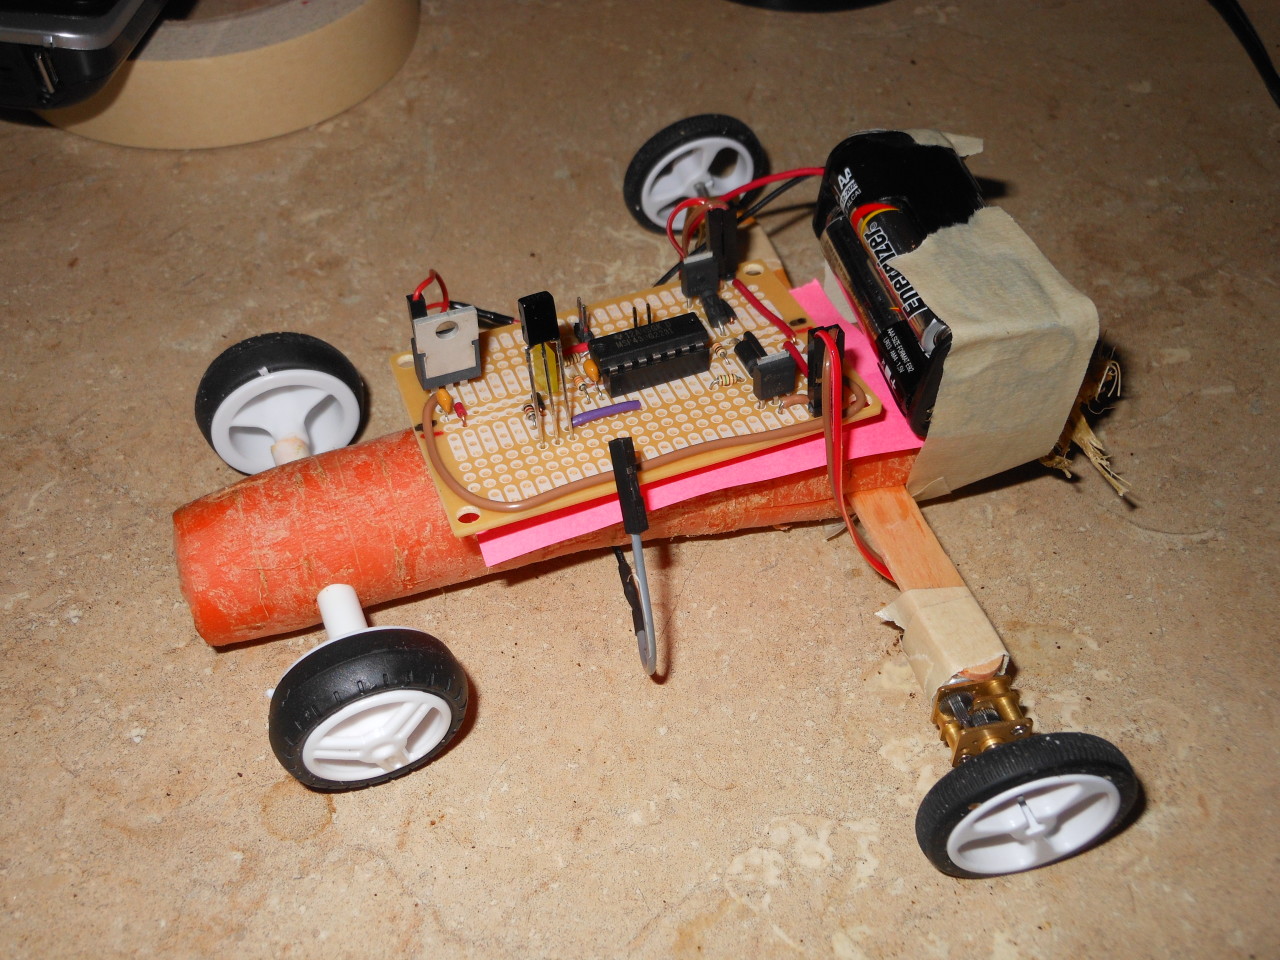
Here's the carrot. There is a Post-it note under the circuit to help separate the circuit from the carrot.
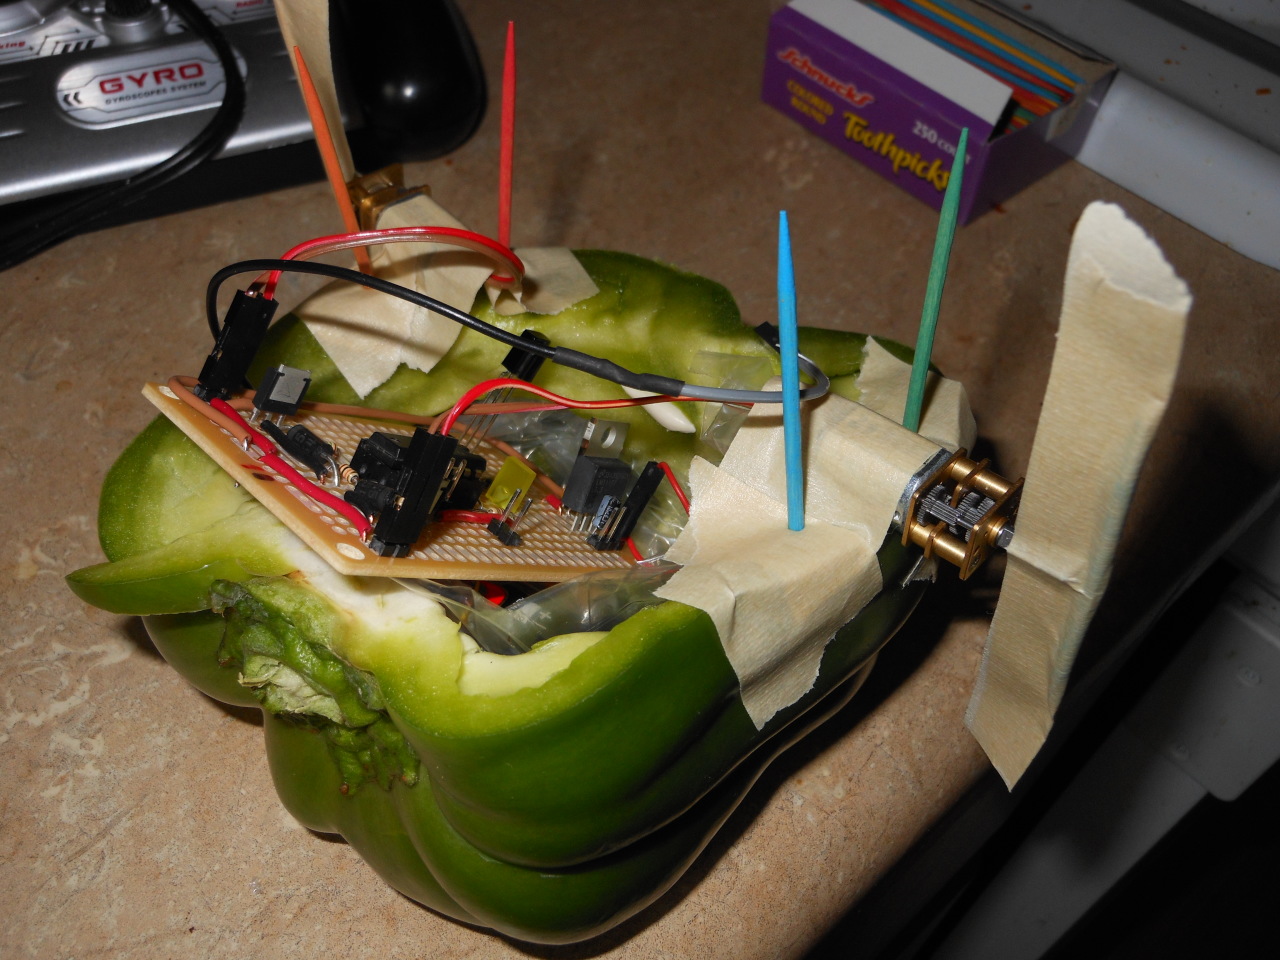
Here's the bell pepper boat. There was a small cut in the back where it seemed water could get in, so I ended up plugging that with a chewed piece of gum. Masking tape didn't hold very well to the pepper to mount the motors, so I used toothpicks to keep the masking tape in place. I really should have reinforced the masking table paddles a little better since they seemed stopping working very well after being in the water for a short time.
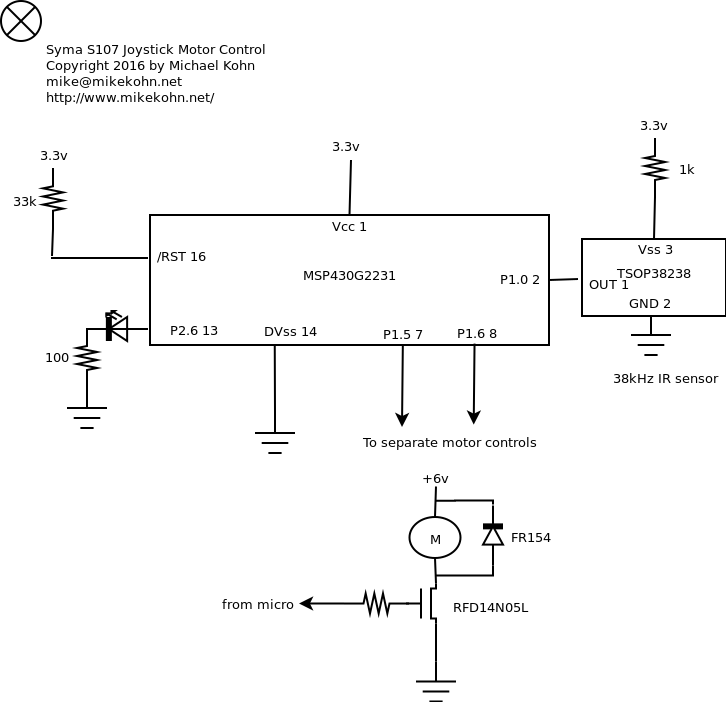
Here's the schematic for the circuit.
Source code
syma_motor_control.asm
Copyright 1997-2026 - Michael Kohn
